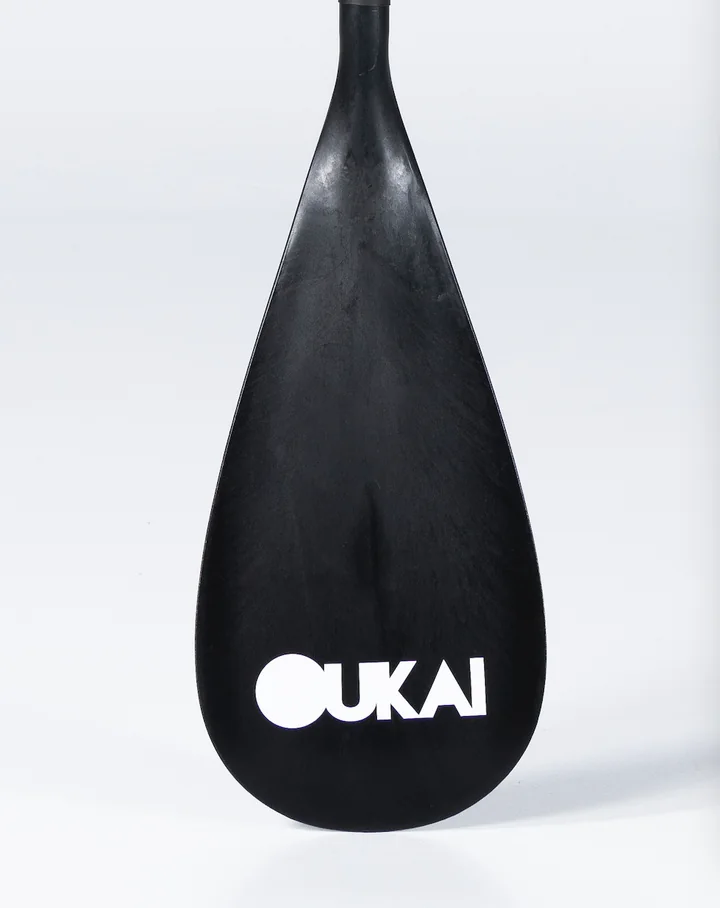
Your logo looks right in the artwork file. On a paddle, the curve can hide part of it, a dark surface can change its appearance, and a clamp can cover the number a customer needs to read. Those details belong in the printing brief.
For custom paddle printing, start with the design, the actual blade or shaft surface, and the wear it will face. Screen printing suits many simple graphics; laser marking is an option for compatible surfaces; waterslide decals and hydro dipping handle different kinds of decorative coverage.
I would separate the logo from the length markings before choosing a process. The photographs here show why: a blade graphic needs room to read, while a shaft scale needs a clear reference point. A single instruction to "add our branding" leaves both decisions open.
Start with the artwork
Which printing method fits your paddle design?
Choose a candidate process from the graphic you need, then confirm it on the specified material and finish. The same logo may need a different approach on an anodized aluminum shaft, a painted composite blade or a molded plastic blade. These choices concern water-sports paddles, including SUP and kayak models.
| Your design | Method to discuss | Check before approval |
|---|---|---|
| Simple logo or solid-color lettering | Screen printing | Opacity, fine lines and registration on the curve |
| Small identifying marks or a scale | Screen printing or laser marking | Contrast, placement and compatibility with the surface |
| Detailed, multicolor graphic in a defined area | Waterslide decal | Edges, trapped air and the finished clear coat |
| Pattern wrapping around a blade | Hydro dipping | Coverage, stretching and acceptable pattern variation |
A supplier should quote the complete decoration process, including preparation and any protective finish. A low printing price means little if it excludes work needed to make the graphic suitable for the selected paddle. Our OEM customization services start with the model, artwork and intended coverage rather than assuming every finish is available on every model.
What changes when the artwork moves from blade to shaft?
Moving artwork onto a shaft means working with a narrower curve, hand contact and possible interference from a clamp. A blade offers more space, but its face, edges and throat do not form one flat canvas. Plan the two areas separately.
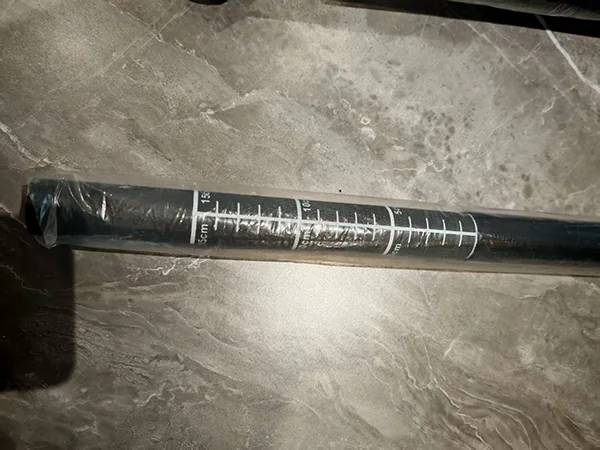
For an adjustable shaft, specify whether a number means overall paddle length or tube extension. Check it with the intended blade and handle installed. The same artwork cannot be moved onto a different assembly without reviewing that relationship. Minimum insertion markings also need to follow the product's engineering requirements.
Give a shaft logo a defined orientation relative to the blade and handle. For a two-bladed kayak paddle, include the agreed assembly angle. Check what remains visible at the intended adjustment settings, with the clamp closed.
On a blade, view the graphic from the intended reading direction and inspect both faces if both are decorated. Photograph the complete paddle as well as the close-up. A close-up can prove that the letters are sharp while hiding an upside-down logo.
The process choices
Screen printing, laser marking, waterslide decals or hydro dipping?
Discuss screen printing for simple graphics, laser marking for compatible surface marks, waterslide decals for localized detail and hydro dipping for broader patterns. None guarantees durability on its own, and the finished appearance depends on the surface beneath it.
Screen printing: simple logos and clear lettering
Screen printing pushes ink through a prepared screen onto the part. A simple solid-color logo or readable scale is a natural starting point. More colors generally mean more setup and alignment work, so ask how small details and color registration will look at the actual print size.
A cylindrical shaft needs suitable support during printing. Curved blade areas can also limit the usable graphic size. Have the supplier confirm the ink and preparation for the actual surface; a successful print on aluminum does not establish compatibility with plastic. Fine lines that look clean on a monitor still need a physical sample.
Laser marking: contrast without a printed ink layer
Laser marking changes the surface to create a mark. It is worth discussing for identifying text, scales and simple logos on suitable materials. It does not create an ordinary full-color graphic, and the contrast depends on the material, coating and laser settings.
Marking and deep engraving should not be treated as interchangeable instructions. On a composite shaft, ask how the process avoids damage to the resin and reinforcement. Approve a trial on the intended material. "Permanent" should never replace that check or imply that severe abrasion cannot obscure the mark.
Waterslide decals: detailed graphics in a chosen position
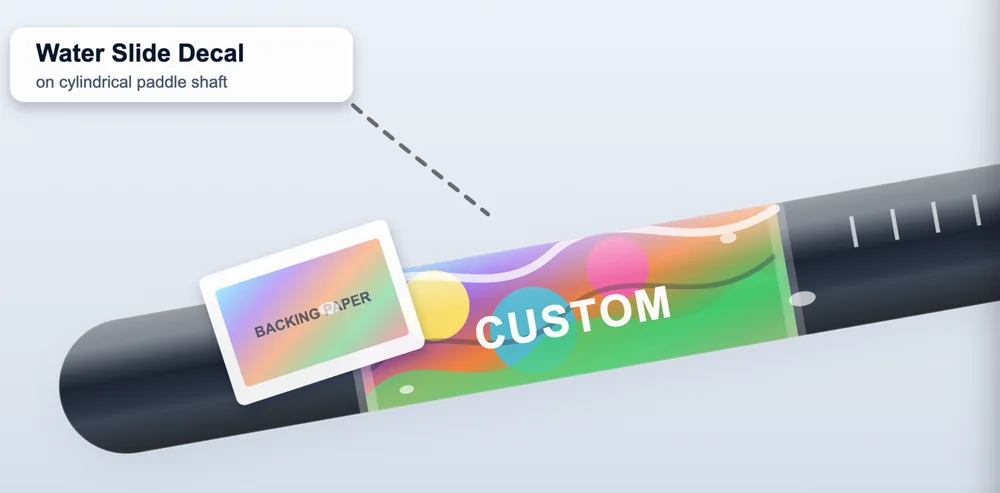
A waterslide decal releases a printed graphic from its backing after soaking and places it onto the part. It can suit multicolor artwork and fine detail that would complicate a simple screen-printing job. The graphic still needs to fit the curve without unwanted wrinkles or trapped air.
Discuss the edge of the decal and its protection as part of the finish. Clear-coat compatibility, application and curing matter; adding a clear layer is not an automatic promise of water or UV resistance. Review the sample after the complete finish has been applied.
Hydro dipping: patterns over curved surfaces
Hydro dipping transfers a floating decorative pattern onto a part as it enters a water tank. It is a candidate for broader coverage, such as a repeating pattern around a blade. The film, preparation and protective finish form one decoration system.
Discuss how much stretching, variation or interruption is acceptable around edges and transitions. A precisely positioned logo and a wraparound pattern are different requirements. Ask whether the logo needs a separate operation. Cost depends on the part, coverage, process steps and quantity, not a fixed rule that dipping is always the most expensive option.
If a pattern resembles carbon fiber, describe it as a decorative appearance unless the underlying construction is separately verified. The checks in our full-carbon paddle guide address that material question.
Why can a good-looking print still fail in use?
A clean-looking print can still have adhesion problems or wear under hand friction, sand and storage contact. Poor surface preparation, incompatible materials or incomplete curing can affect adhesion. Water exposure and sunlight create other demands that a visual inspection alone cannot resolve.
When a defect appears, record where it starts. Lifting at a decal edge suggests a different investigation from wear only at a grip area. Neither observation establishes the cause by itself. Photograph the affected area and record the material, finish, exposure and sample identity before changing the process.
A defined test is more useful than an informal instruction to "try some tape." ISO 2409 cross-cut testing assesses coating resistance to separation after cuts are made. It is not a measurement of adhesion force, and its stated limits include certain coating thicknesses and textured surfaces. Ask the test provider whether it fits the proposed coating and part.
For fading or abrasion requirements, agree on the exposure, duration, evaluation and acceptable change before the sample is tested. Do not turn a test duration into a service-life promise without supporting evidence. Salt-spray testing should answer a relevant corrosion question, not serve as a universal stamp of print quality.
Before production approval
What should you check on the printed sample?
Check graphic size, position, color, scale accuracy and the final finish, then review any agreed performance tests separately. Approve the complete decorated part against a written artwork reference. Keep a reference sample or agreed photographs with that record so repeat orders have something specific to match.
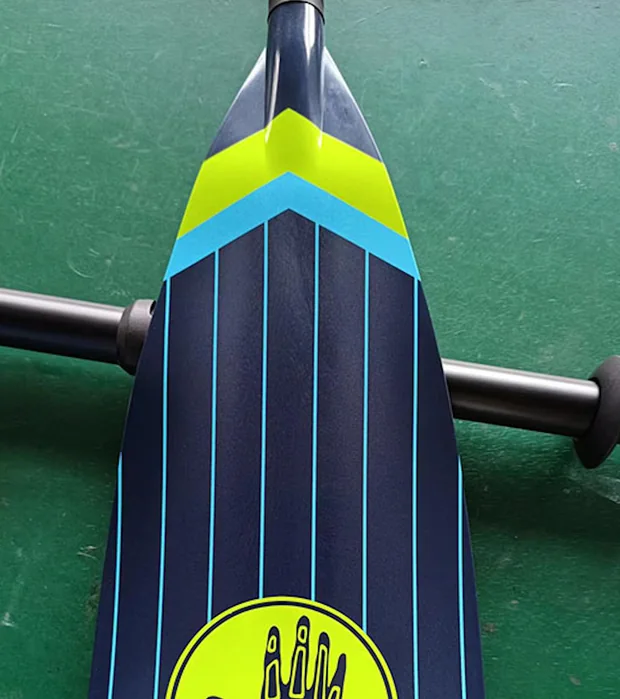
- Size and position. Specify dimensions and reference points on the part. Check each decorated face.
- Color and legibility. Compare under agreed lighting. Inspect small text at its intended reading distance.
- Scale meaning. Confirm units, direction and the assembly used to verify length markings.
- Edges and finish. Inspect wrinkles, bubbles, exposed decal edges and unwanted changes in gloss.
- Agreed performance. Record the test method, sample condition and acceptance criteria separately from appearance approval.
I would keep a satisfactory appearance sample separate from any specimen used for a destructive test. Otherwise, a cut or rubbed area can become part of the reference someone later tries to match. Label the two clearly and retain the relevant test record with the specification.
If the buyer requests ASTM D3359 tape adhesion testing, confirm the substrate and procedure with the test provider. Its published scope concerns coating films on metallic substrates; use on other materials requires attention to the method's limitations. The standard name alone does not define a complete test agreement.
Artwork approval also needs to reach the people assembling and inspecting the product. The paddle manufacturing walkthrough explains how the approved reference connects those stages.
For a repeat order, identify the artwork revision and the approved sample in the purchase specification. Ask for another review if the base color, coating, graphic dimensions or paddle assembly changes. A familiar logo does not mean the whole decorated part is unchanged. Agree which changes need a new physical sample and which can be checked against a dimensioned drawing.
What artwork and specifications should you send?
Send the paddle model, artwork file, print dimensions, placement, color reference, quantity and intended use. A logo pasted into an email does not show its position, orientation or the surface it will be applied to.
- The paddle model and material or finish of each decorated part.
- A vector logo where available, or artwork suitable for the intended output size. Include an outlined-text version when fonts matter.
- Graphic dimensions and an annotated placement drawing, including both faces where required.
- A physical color reference or named brand colors, plus the intended base color and gloss.
- Order quantity by design, and any model names, scales or serial information that vary.
- Use conditions and any agreed abrasion, water-exposure or weathering requirements.
Ask the quotation to distinguish artwork preparation, decoration setup, sampling and repeat-order costs. If a requirement is still open, say whether you want a recommendation or a priced alternative. That is more useful than approving a process name and discovering its limits after the sample arrives.
For example, a brief for an adjustable SUP paddle might request a white logo on one blade face and white length markings on the upper shaft. Attach separate placement drawings for those two areas. State whether the numbers refer to the assembled paddle length, identify the blade and handle, and ask the supplier to propose a compatible decoration process. This describes the result you need without choosing a method prematurely.
When comparing quotations, I would put both suppliers' inclusions beside the same drawing. Does each price cover the same number of printed faces, the final protective finish and the requested sample? Ask whether changing a color or adding a second design changes the setup charge. Keep the quantity per artwork version visible: a total order quantity alone does not explain how many different printing jobs are involved.
Frequently asked questions about custom paddle printing
Are waterslide decals and hydro dipping the same?
No. A waterslide decal transfers a prepared graphic to a chosen position. Hydro dipping transfers a floating pattern onto a part as it enters a water tank. Ask which process the supplier means by water transfer printing, especially when a logo needs an exact position.
Will a laser-marked logo last forever?
No marking is immune to damage. Laser marking does not rely on an ink or decal layer, but wear can still remove or obscure the marked surface. Approve the contrast and surface condition on the actual shaft material rather than accepting a blanket lifetime claim.
Can the supplier match the colors on my screen?
A screen image is a starting point, not a physical color standard. Send the brand color reference and review a printed sample on the intended base color and finish. If the match is critical, agree on the viewing conditions and acceptable variation before production.
Does a new logo require a new paddle mold?
Not necessarily. Applying a graphic to an existing model is different from changing the molded blade shape or adding a raised logo. Ask the supplier to separate decoration setup from any tooling changes in the quotation.
Conclusion
Approve the printed paddle, not just the artwork
A suitable printing method puts the required graphic on the specified surface and meets the agreed checks. Keep the artwork, assembled orientation, finish and sample approval together. If any of those changes, review the decoration again before repeating the order.
Send your paddle model and artwork with the areas you want printed. Aaron Deng can coordinate the review of placement, surface compatibility and sampling requirements.
Send your printing requirements